Vue.jsのプロジェクトでThree.jsを使ってみたのでその手順をまとめておく。
環境
DockerでVue.jsとApacheの環境を作成すると同様にDockerを使う。DockerfileにThree.jsのインストールを追加する。
FROM httpd:2.4

WORKDIR /app

# node.jsなどをインストール
RUN apt-get update \
 && apt-get -y install --no-install-recommends \
    nodejs \
    npm \
	curl \
 # キャッシュ削除
 && apt-get clean

# node.jsを最新にする
RUN npm install -g n \
 && n stable \
 && apt purge -y \
    nodejs \
	npm

# Vue.jsとCLIインストール
RUN ["/bin/bash", "-c", " \
    source ~/.bashrc \
     && npm install vue \
     && npm install -g @vue/cli \
     && npm install three \
 "]

EXPOSE 80 8080
Vue.jsプロジェクトの作成
今回はマニュアルを選択して次のように選択。
- ? Please pick a preset: Manually select features
- ? Check the features needed for your project: Choose Vue version, Babel, Router, Linter
- ? Choose a version of Vue.js that you want to start the project with 2.x
- ? Use history mode for router? (Requires proper server setup for index fallback in production) No
- ? Pick a linter / formatter config: Standard
- ? Pick additional lint features: Lint on save
- ? Where do you prefer placing config for Babel, ESLint, etc.? In dedicated config files
Three.jsでコンテンツ作成
Three.jsのサンプルをVue.jsで動作するようにする。Canvasコンポーネントを作成し、サンプルのHelloworldコンポーネントと置き換える。作成したプロジェクトのsrcディレクトリ配下のファイル構成を以下のようにする。
まずはcomponentsディレクトリ配下にCanvas.vueを追加する。
<template>
    <div ref="container" id="container">
    </div>
</template>

<script>
import * as THREE from 'three';

export default {
  name: 'Canvas',
  data () {
    return {
      camera: null,
      mesh: null,
      scene: null,
      renderer: null
    };
  },
  created () {
    this.init();
    window.addEventListener('resize', this.onWindowResize);
  },
  destroyed () {
    window.removeEventListener('resize', this.onWindowResize);
  },
  mounted () {
    this.animation();
    this.$refs.container.appendChild(this.renderer.domElement);
    this.onWindowResize();
  },
  methods: {
    init: function () {
      this.camera = new THREE.PerspectiveCamera(70, window.innerWidth / window.innerHeight, 0.01, 10);
      this.camera.position.z = 1;

      this.scene = new THREE.Scene();

      const geometry = new THREE.BoxGeometry(0.2, 0.2, 0.2);
      const material = new THREE.MeshNormalMaterial();

      this.mesh = new THREE.Mesh(geometry, material);
      this.scene.add(this.mesh);

      this.renderer = new THREE.WebGLRenderer({ antialias: true });
      this.renderer.setSize(window.innerWidth, window.innerHeight);
      this.renderer.setAnimationLoop(this.animation);
    },
    animation: function (time) {
      this.mesh.rotation.x = time / 2000;
      this.mesh.rotation.y = time / 1000;

      this.renderer.render(this.scene, this.camera);
    },
    onWindowResize: function () {
      this.camera.aspect = window.innerHeight / window.innerHeight;
      this.camera.updateProjectionMatrix();
      this.renderer.setPixelRatio(window.devicePixelRatio);
      this.renderer.setSize(window.innerHeight, window.innerHeight);
    }
  }
}
</script>

<style>
#container {
  margin: 0 auto;
  width: max-content;
}
</style>
次に追加したCanvas.vueをサンプルのHelloworldコンポーネントと置き換えるようにHome.vueを修正。
<template>
  <div class="home">
    <img alt="Vue logo" src="../assets/logo.png" />
    <!--<HelloWorld msg="Welcome to Your Vue.js App"/>-->
    <Canvas>
    </Canvas>
  </div>
</template>


<script>
// @ is an alias to /src
// import HelloWorld from '@/components/HelloWorld.vue'
import Canvas from '@/components/Canvas.vue'

export default {
  name: 'Home',
  components: {
    // HelloWorld,
    Canvas
  }
}
</script>
このままだとサーバー起動時にエラーが発生するので、プロジェクトディレクトリ配下の.eslintrc.jsのrulesに「'semi': 'off'」を追加してESLintで行末の「;」をエラーとしないように設定する。
module.exports = {
  root: true,
  env: {
    node: true
  },
  extends: [
    'plugin:vue/essential',
    '@vue/standard'
  ],
  parserOptions: {
    parser: 'babel-eslint'
  },
  rules: {
    'no-console': process.env.NODE_ENV === 'production' ? 'warn' : 'off',
    'no-debugger': process.env.NODE_ENV === 'production' ? 'warn' : 'off',
    'semi': 'off'
  }
}
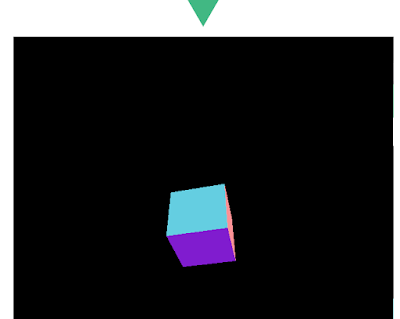
ファイルの編集などが終わったら開発サーバを起動。ブラウザでhttp://localhost:8080にアクセスすると以下のようなThree.jsのサンプルが表示される。

0 件のコメント:
コメントを投稿